
Departments: auto-assignment and app areas
Departments structure your team. They decide who sees which tickets, which areas of the app members can use and whether new tickets are assigned automatically. Only admins can see this page.
Where to find the page
Section titled “Where to find the page”Administration › Settings › Team › “Departments”.
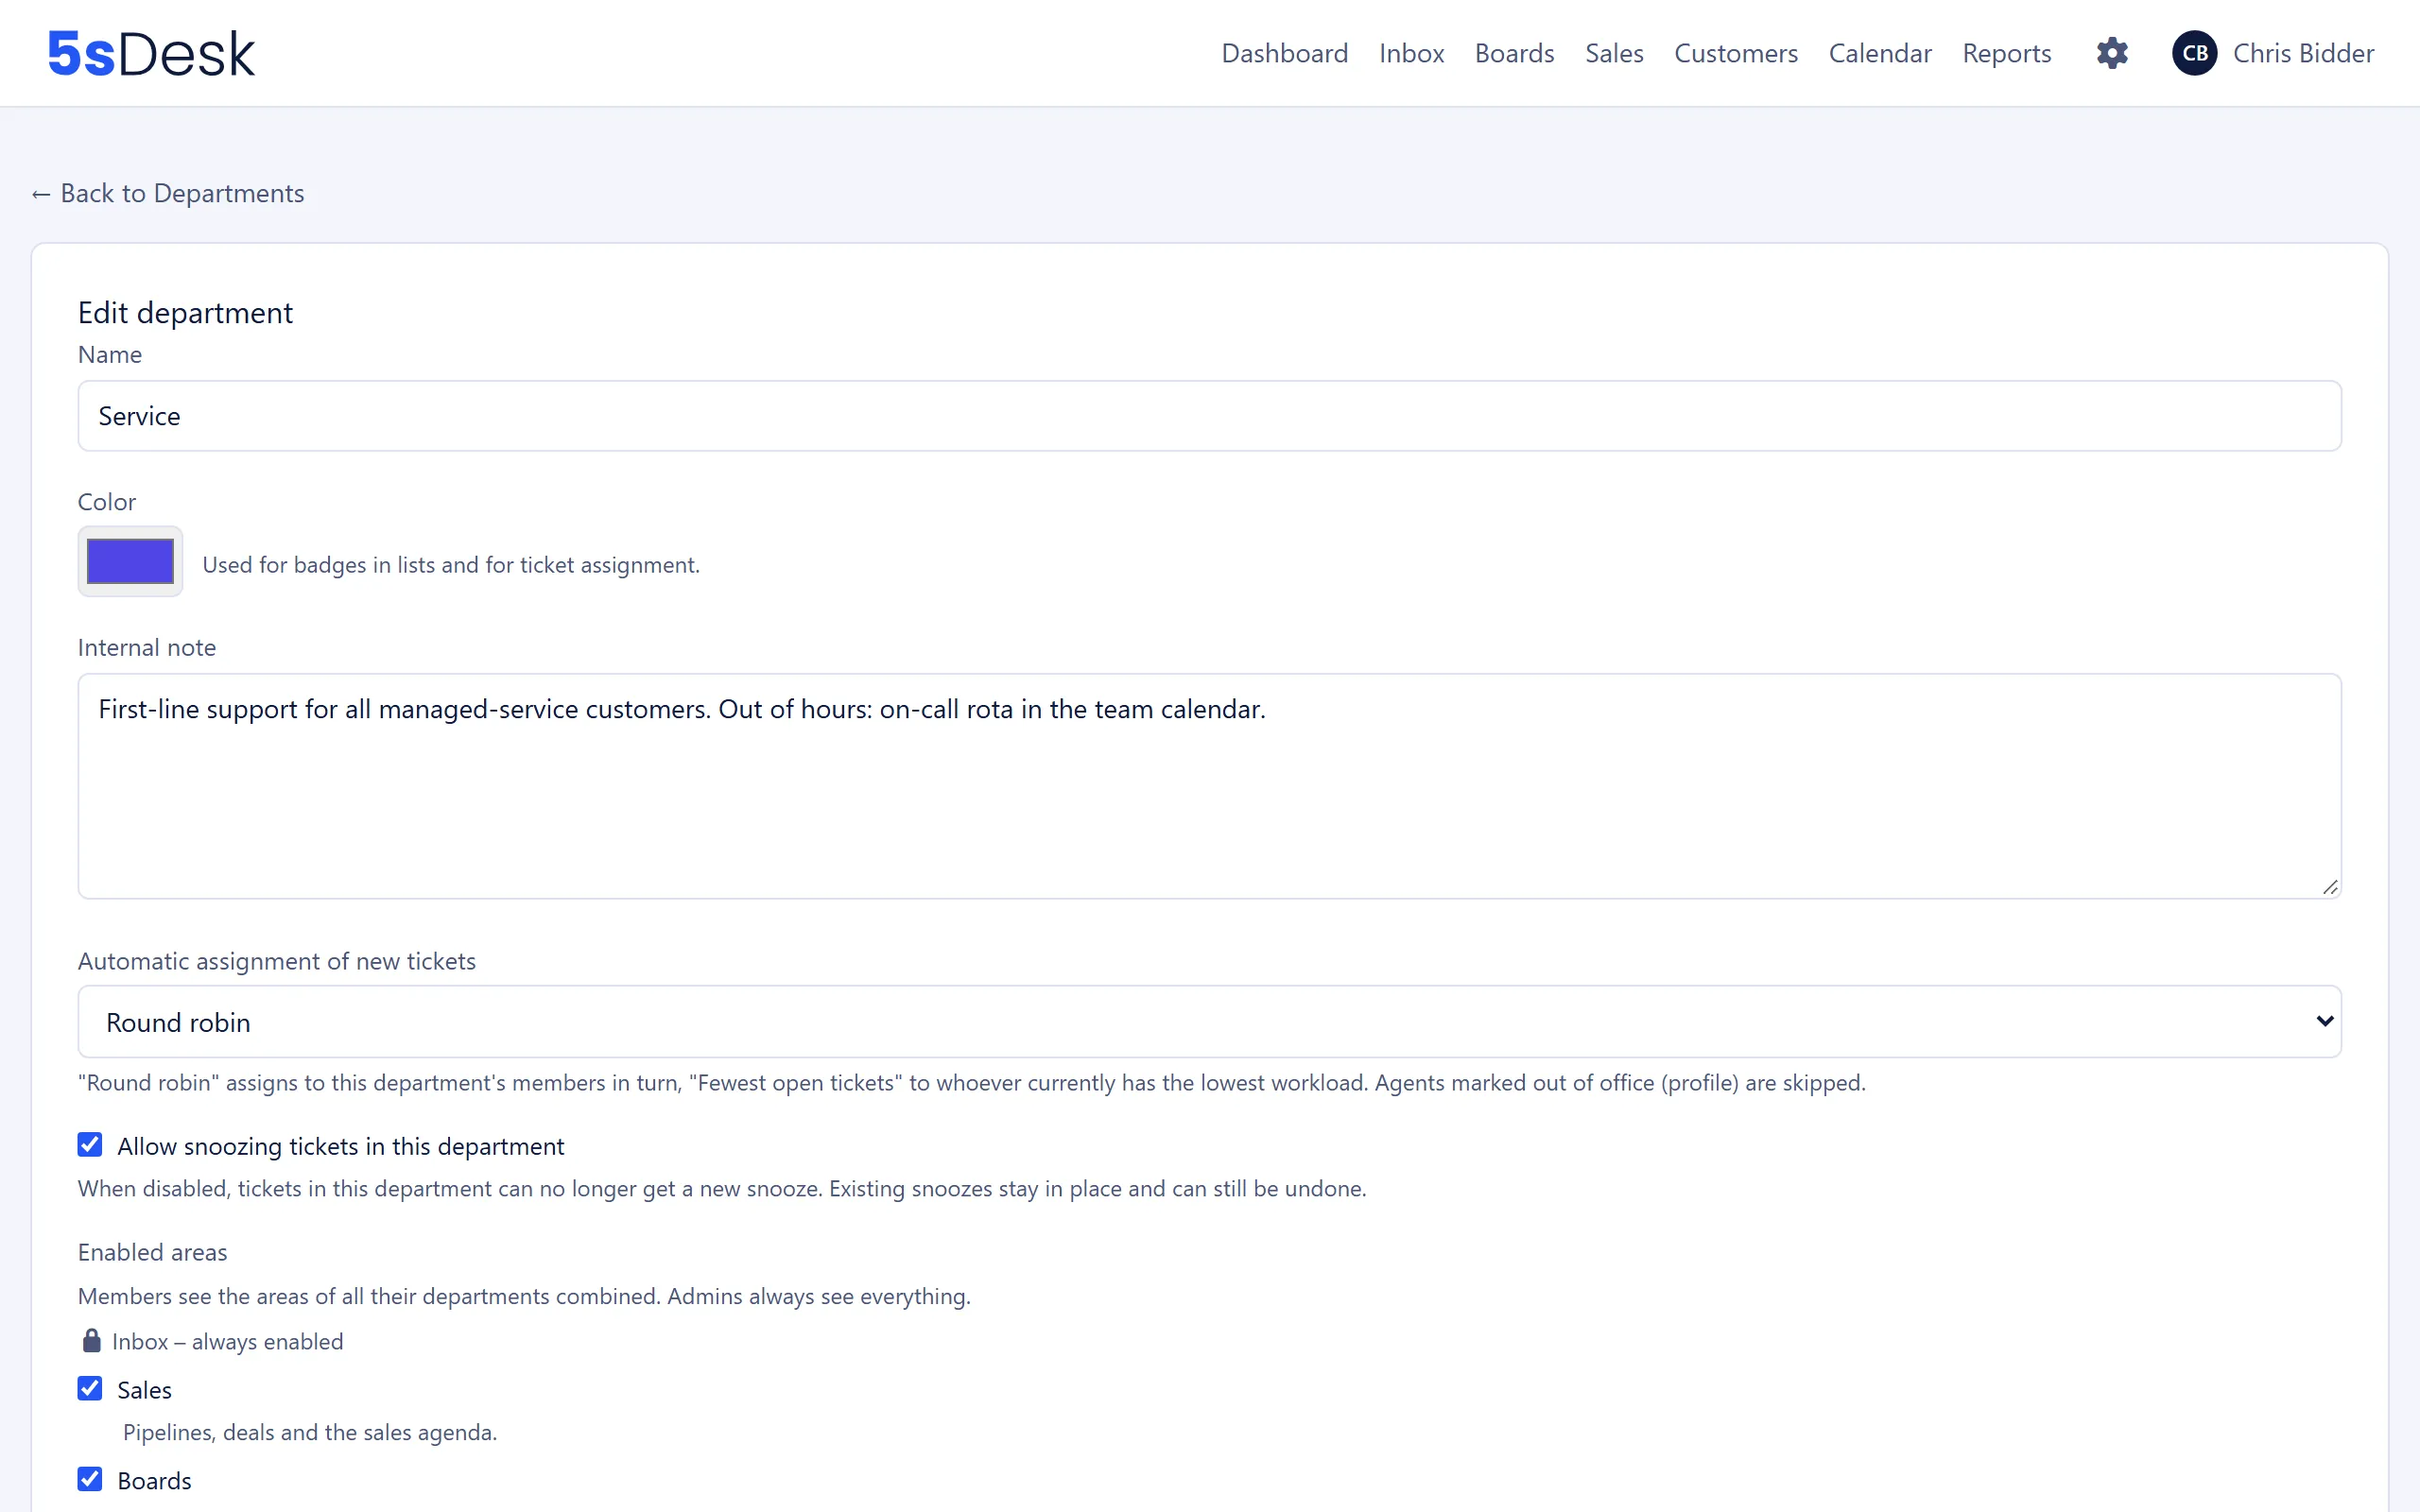
“New department” opens the “Create new department” form. Clicking an entry opens “Edit department”. At the bottom of the form, “Delete department” takes you to the confirmation page.
The list
Section titled “The list”Each department shows its name and colour and, where relevant, badges: the automatic assignment mode (“Round robin” or “Fewest open tickets”), “Snoozing disabled” and “… of … areas” if not all areas are enabled.
Settings at a glance
Section titled “Settings at a glance”| Field | Meaning | Default |
|---|---|---|
| “Name” | Unique within the organisation. Required | empty |
| “Color” | Used for badges in lists and for ticket assignment | Violet |
| “Internal note” | Only visible to agents, e.g. responsibilities or cover arrangements | empty |
| “Automatic assignment of new tickets” | “Off”, “Round robin” or “Fewest open tickets” | “Off” |
| “Allow snoozing tickets in this department” | When unticked, no new snooze can be set for tickets in this department. Existing snoozes remain and can be cleared | on |
| “Enabled areas” | Which parts of the app members of this department can see | all |
Automatic assignment
Section titled “Automatic assignment”- “Round robin” assigns new tickets to the department’s members in turn. A pointer remembers who was last and keeps going round in a circle.
- “Fewest open tickets” picks the member with the fewest open tickets. If there is a tie, the round-robin order decides, so the same person does not always win.
Only active members of the department who are not “Out of office” are candidates (see Users). Assignment only applies to new tickets that have a department and are not yet assigned to anyone. Tickets from the history import, auto-generated emails, emails from blocked senders and tickets without a department are not assigned. The assigned person receives a notification, and the ticket history records the automatic assignment with its mode and department.
Enabled areas
Section titled “Enabled areas”The inbox is always enabled and cannot be switched off. You choose the other areas for each department:
| Area | Hint in the app |
|---|---|
| “Sales” | “Pipelines, deals and the sales agenda.” |
| “Boards” | “Task boards and cards, including “Create card” on a ticket.” |
| “CRM (customers & companies)” | “Customer and company records, the CRM box on a ticket and new bulk mails.” |
| “Calendar” | “Week and day calendar.” |
| “Appointments” | “Appointment overview and own working hours for booking.” |
| “Time report” | “Only the report under Reports. Everyone can track time as long as time tracking is on in the settings.” |
| “Content” | “Maintaining content and the knowledge base, including “Content page from ticket”.” |
Members see the areas of all their departments combined. Admins always see everything.
Delete a department
Section titled “Delete a department”The “Delete department “…”” page lists everything linked to the department under “This data will be moved”: tickets, assigned users, boards, mailboxes, internal content, canned responses, SLA policies, appointment types, appointments, lead forms, the Freshdesk import and Freshdesk group mappings. Under “Move everything to”, choose the target department and confirm with “Move and delete”.
- No tickets or data are lost.
- Users who were only in the deleted department become members of the target department.
- Department leads of the deleted department are lost. The page shows “… department lead(s) of this department are dropped when merging”. Afterwards, set the lead of the target department under Users.
- “Tickets whose assignee has no access to the target department lose their personal assignment and go back to the team.”
- You cannot delete the last department.
How to do it
Section titled “How to do it”- Click “New department” and enter a “Name” and “Color”.
- Choose the mode for “Automatic assignment of new tickets” and the “Enabled areas”.
- Click “Save”. Admins and owners automatically become members of the new department.
- Add other agents under Users.
- Link the department to a mailbox under Mailboxes, so new emails end up there.
What changes
Section titled “What changes”- Tickets, boards, pipelines, appointment types and content are tied to departments. Only members can see them, and this also applies to admins.
- A mailbox linked to a department creates new tickets in that department.
- The colour appears as a badge in the inbox, the mailbox list and when assigning tickets.
See also
Section titled “See also”- Users: Membership, department lead and “Out of office”.
- Roles and permissions: How departments decide what data people see.
- Mailboxes: Link a mailbox to a department.
- SLA / Response times: Deadlines for each department.
- Email and inbox: Snoozing and assignment in a ticket.